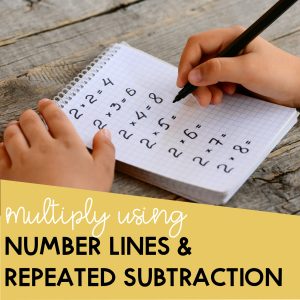

Task cards are great way to review a lesson or a topic. With the limitation of an online classroom, our favourite set of cards just won’t cut it. Thanks to Google Forms, we can still use these just by using a quick snipping tool or screenshots of your task cards and turning them into a form.
You can still review your students using your favourite task cards.
How to turn your task cards into self checking Google Form
Step 1: Take a screenshot of each question in your task card.
Take a screenshot of each question on the task card.
For Mac users, press Command + Shift + 4 so you can select only a part of the screen to take a screenshot of.
For PC users, go to Start, look for Snipping Tool and choose the part of the screen that you want to take a screenshot of.
Tip: It helps to have the screenshots in one folder so you can easily find it once you upload on Google Forms.
Step 2: Set up your Google Form.
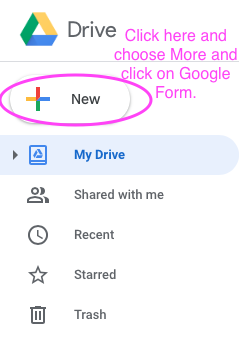
Sign in to your Google account. Go to your Google Drive. (Click on the 9 square dots just right beside your picture) Make a folder for your new forms to keep your forms organised.
Once you’re inside the folder, click on the New button or the big plus sign on the left side of your screen. Hover on More and click Google Form.
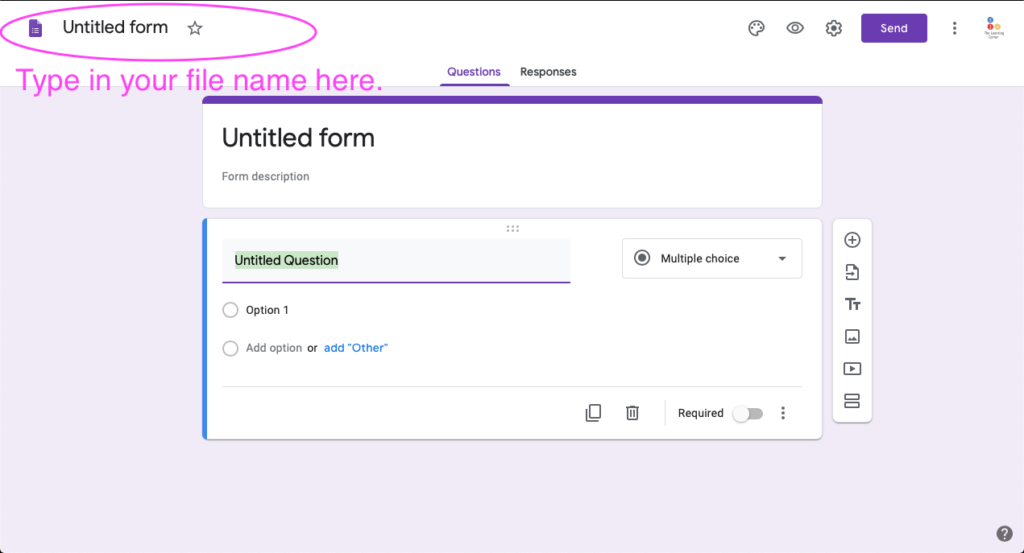
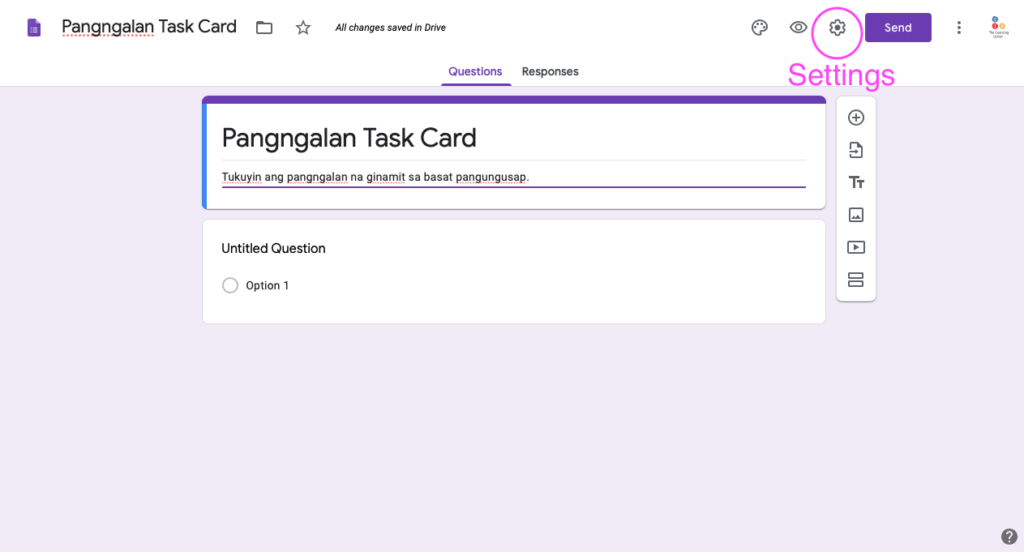
Now that you’re inside Google Form, type in your title on top of the screen. In this case, my title is ‘Pangngalan Task Cards’. You can type in a description to say more about the Form.
After setting up a title for your form, click on the settings icon. It’s the one beside the Send button. Click on the tab that says Quizzes. Choose the option to Make this a quiz. Then, you can choose from a lot of options.
Here’s what these options do after hitting the submit button on the Forms:
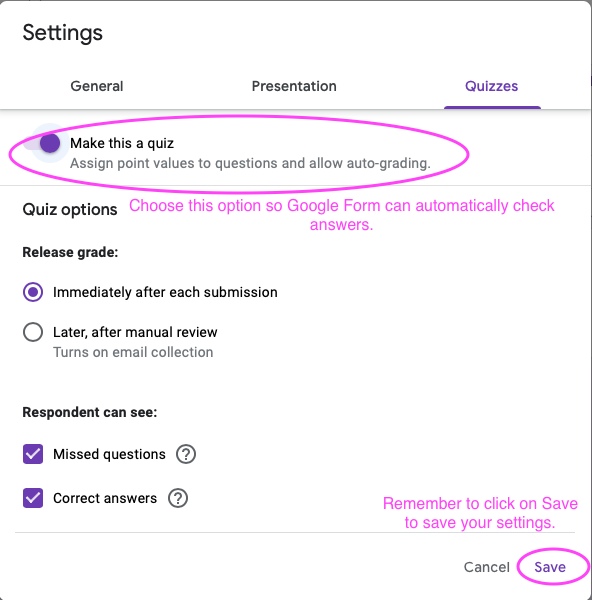
- Release grade immediately after each submission – This will let your student see what grade they got.
- Later, after manual review – This will let you review your student’s answers first, before releasing their grades. (I find this useful for Short answer questions)
- Respondent can see missed questions – Your students will see which questions they missed.
- Respondent can see correct answers – Your students will see the correct answers when they make a mistake. I find this very useful for review. It’s a quick feedback for your students.
- Respondents can see point values – Your students will see how much point is allotted in one question.
For this one, I’ll choose to release grade after each submission, and I want my students to review the answers right away so I’ll choose all three for what they can see after submitting the form. Don’t forget to hit the Save button.
Step 3: Start typing in your questions.
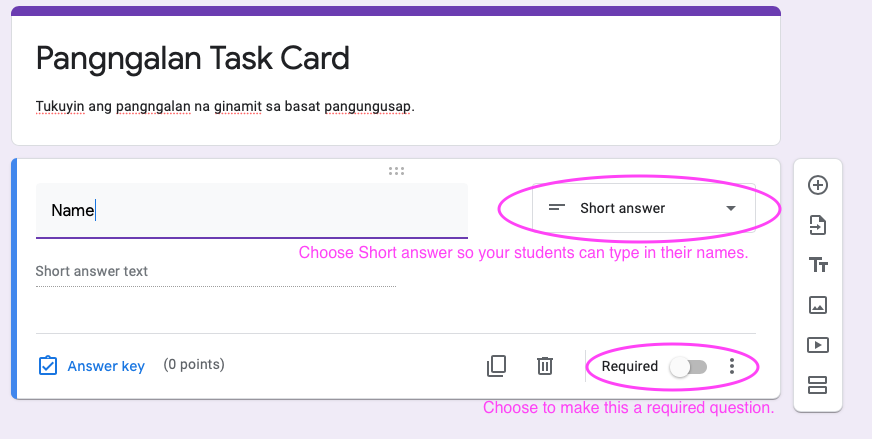
Now that you got that set up, you’re back to the form. You’ll see an Untitled Question. Type in ‘Name’ (Don’t forget this step. It’s crazy not knowing who answered your form.) Make it a required question so they don’t miss it.
To make another question, click on the plus sign on the right side of the first question.
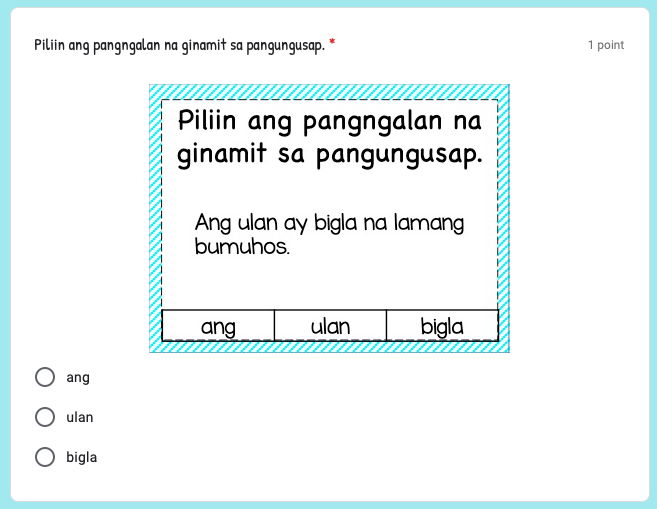
Then, type in your question. Click on the image button beside the question. You have two options to upload.
- Look for the file in your Folder from your computer and drag and drop the image you want to use for the question.
- Click on Browse, and look for the file using Google’s document browser.
Now that you have the image uploaded, you can click on the three dots on the upper left corner of the image. Choose the alignment of the image. I want it in the middle of the form so I choose Center.

To make this a multiple choice question, click on the dropdown menu. Choose Multiple Choice. Then, type in your choices on the bullets that says Option 1. Press Enter to type in the next question. Type in the choices given on the task card.
Step 4: Assign answers fro checking.
To help Google Forms check, click on Answer Key and choose the correct answer. Don’t forget to type in the number of points you’d like to assign for that question if this is a graded assessment. Click Done.

Make the question a required one so they don’t skip it.
Step 5: Duplicate the question to make another one.
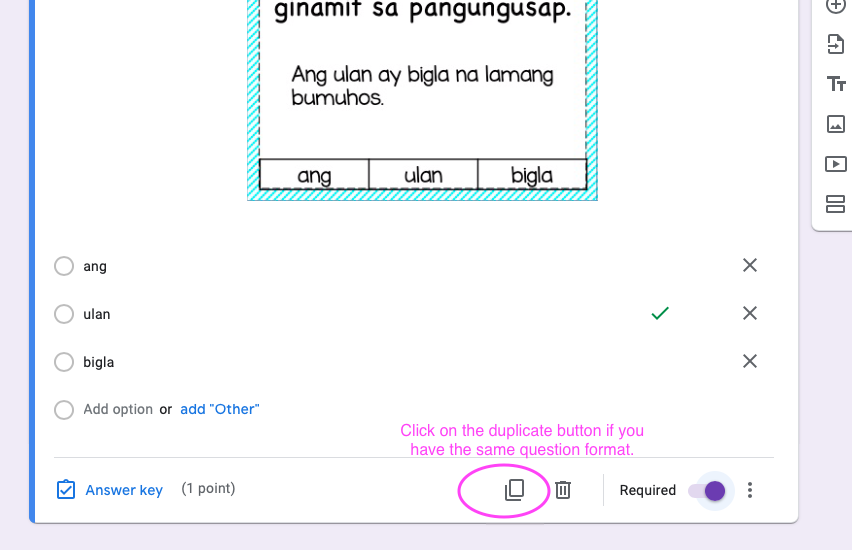
Now that you made one card into a question, you can just duplicate that format. To duplicate this question, click on the duplicate button. To change the picture, look for the three dots on the upper left hand corner of the image. Click on change and upload the image of the next question. Don’t forget to change the options and the answer key. Click Done!
Just keep on doing these steps until you’re done uploading your questions and don’t forget to change the options and the answers so your students will see the correct answers once they submit the form.
Here’s a FREE sample of a task card turned into a Google Form!